I Fixed a Chair

Yup this is pretty much self-explanatory.  I made oura rocking chair usable again.  To start at the beginning, we bought a simple rocking chair from Wal-Mart (first mistake possibly…) before Tyler was born for, well you know, all that rocking new babies need.  We used it for quite awhile until Tyler outgrew all that rocking around 4 months, but the chair had developed some problems along the way. The springs were just metal zig zags that were stuck intp drilled holes in the seat.  Needless to say when the springs got a little bent they popped right out, and there was no going back.

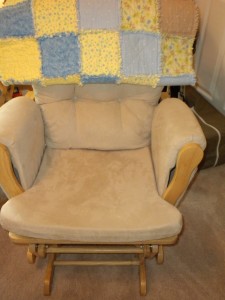
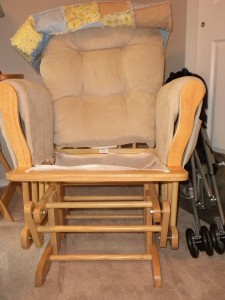
The chair before.  The springs have been removed as well as the top pad.  If you sat down, you'd fall right through!

The chair before. The springs have been removed as well as the seat pad. If you sat down, you’d fall right through!

My plan of action to make this sucker usable again was to make a new seat like the lawn chairs that have the plastic weaved on the metal frame.  Since I didn’t have that plastic stuff that was used for that, I dug out some old burlap that I’d had for about 2 years now.  Since burlap isn’t exactly a fine weave, I decided make each strip doubled.

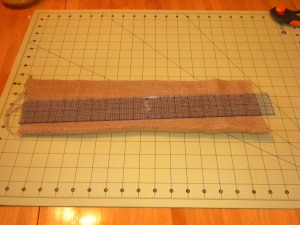
Cutting each strip of burlap to weave across the chair seat.

Cutting each strip of burlap to weave across the chair seat.

Each strap was measured to allow about a half an inch extra material past the side of the chair seat “hole”. To secure my loose weave burlap a little bit more, I sewed the ends shut with my trusty dusty sewing machine.  I created 6 straps, 3 for each direction.  It was then time to attach them!

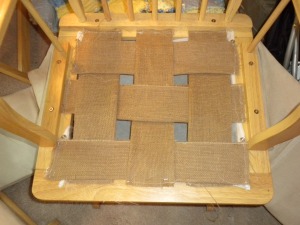
The new "springs" for my rocking chair.

The new “springs” for my rocking chair.

I attached each strap with the staple gun, which I never used before.  It was way easier than I was expecting!  My plan was just to do two on each end of the chair, but to be on the safe side (and because it was fun!), I just decided to put as many staples in as I could.  This was a cheap chair, it really didn’t have to be a pretty fix!

DSCN1119

With the cushions back! All fixed and ready for some rockin’!

I tested it out after I finished just to make sure it held.  Tyler loves to rock in it (even before it was fixed), so I didn’t want it to fall apart immediately.  It seems to be holding on pretty well so far!  Now I don’t have to get rid of a chair that only had one very easy problem to fix!

The Difference a Year Makes

Happy Labor Day weekend!  It’s a hot, miserable day to kick off the Illini football season here today, and I can’t be happier.  That’s because it’s the complete opposite of last year when Hurricane Isaac came through and busted our drought.  More importantly it’s a very different weekend in our lives.  It was possibly the worst in either Eric’s and my lives.  Tyler had intussusception and subsequent surgery to fix it.

It all started the Friday before Labor Day.  Tyler was very sick with what we thought was a nasty cold.  He was sleeping constantly and very miserable.  Sometime that evening we decided it was time to take him to the doctor.  He was lethargic, listless and not like himself at all.  When we got to convenient care, he threw up in the lobby.  If you want to get in quickly to see a doctor, that’s the way to do it.  We didn’t even have time to fill out the forms.  The doctor told us it was a virus and an ear infection and sent us home.  We thought that didn’t sound too bad, until we got him home and one of us was up with him all night.  He just kept throwing up.  It was a long exhausting night and the poor guy just kept getting worse and worse.

Once the morning came, we were back in contact with the hospital. This time talking to a nurse on the patient advisory line.  Even though he’d been throwing up all night they told us that we couldn’t bring him in until it had been 6 hours with nothing going in him.  So we sat around the house all day on Saturday watching the Ilini game as everything we put in him came immediately back out.  It was awful.  He wanted to be held constantly.  If he wasn’t throwing up, he was crying.  My poor baby was miserable.  As soon as the Illini game was over, I’d had enough.  It hadn’t been 6 hours yet but we were going to the ER.

Once there, it only got worse.  He had become pretty unresponsive.  Once we finally saw a doctor, they berated us for waiting so long to come in because he was so dehydrated (I’d like to give the nurse who told us to wait 6 hours a piece of my mind). They started an IV in him which as a parent was quite possibly the worst thing ever.  They couldn’t get the IV into his tiny little 6 month old baby veins.  They poked and prodded.  There were 3 of us holding him down.  To this day, I want to break down and cry thinking of it (in fact I’m tearing up right now).  He needed it though. He was so dehydrated and still couldn’t keep anything down.  After a good 30-40 minutes of them attempting they finally got it in, he started getting fluids, and he started getting better.  He actually ate without it coming back up and we thought we’d get to go home and enjoy the rest of our long weekend.  Unfortunately that wasn’t the case.  They got a room ready for him because they wanted to make sure he continued getting the fluids he needed and that he stayed ok through the night.  In retrospect I’m very thankful they did this even though at the time I just wanted to go home and take care of my son.

Finally around 8pm that night we made it to Tyler’s room.  I came home to get some clothes and food and to let Guster out, so that I could spend that night.  Eric came home shortly after I got back.  If I thought the previous night was bad, this one was a lot worse.  About an hour after Eric left, Tyler started crying and getting sick again.  The nurses came in to check on him, but it was pretty much just me and him trying to make it through the night.  Neither of us slept much.  I spent a lot of the night standing and rocking and shushing him.  The nurses eventually had me marking on the board how much he was eating and what time it came back up.  It ended up that nothing was staying in at all.  It continued into the next day, but luckily Eric came so I could at least take a little cat nap.  It felt like it took forever for the on call doctor to come in.  I would have said it was at least noon, but it was probably more like 10am.

The on call weekend doctor thought it was probably just that he was extremely constipated, and his stomach was upset.  They gave him a laxative and took some x-rays just in case.  The x-rays didn’t show anything, but since it was a Sunday, the doctor wanted to be on the safe side. He ordered a CAT scan.  He told us he really didn’t think it would find anything though. The CAT scan like the IV was another horrible experience of Eric and I holding him still to try to get a good image.  It took a lot of tries and a lot of screaming and crying.  Shortly after we got back to our room, the doctor came in looking very grim and told us it was intussusception, and that it required surgery.  (TMI warning here) An intussusception is basically when the bowel goes in on itself basically.  It telescopes.  Usually, there is bloody stool (sorry to gross everyone out!), which Tyler didn’t have.  His body just wouldn’t let anything go through.  There are no pediatric surgeons at our hospital or in Champaign at all, so Tyler would have to go to Peoria to the OSF Children’s Hospital.  They wanted to take him by helicopter, but since Hurricane Isaac was visiting that weekend, it was too bad to fly.  We were going by ambulance.  This was actually better because one of us could go with him this way.

It seemed to take FOREVER for the ambulance to come.  From what the doctor told us, it seemed like it was an emergency situation, and that it needed to come quickly.  As we sat there, Eric and I just got more and more anxious and Tyler got more and more listless. Finally, they got there and tied Tyler’s car seat onto the board.  The ambulance seemed a little on the incompetent as well.  If we hadn’t had the car seat, we have no idea how they would have transported him. Eric rode with Tyler to Peoria while I came home to get clothes and things Tyler might need while we were there and to get Guster’s stuff ready for my parents coming to pick him up.  I don’t remember the drive at all except crying a lot and trying to stay awake.  It’s a bit of a miracle in itself that I got there unscathed.

Tyler and Eric were already in a room when I got there.  Then there was more waiting.  At some point, they finally came to get him to take him to have an ultrasound to determine how bad the telescoping was.  They had one procedure to try before going to surgery, a “nonoperative reduction”.  Basically they gave him an air enema to try to cause the part of the intestine that is inside the other portion to stretch back out.  The nurses and ultrasounds techs told us it would be very hard to watch, and he’d be very uncomfortable.  After watching the IV and the CAT scan, I couldn’t bare to stay and watch the air enema.  Eric stayed with him though, and was the support I couldn’t give at that point.  It took a lot longer than I was expecting which I had a feeling would mean bad news.  It was.  He supposedly did  not respond to it, so it was time for surgery.  We met Tyler’s surgeon.  He wasn’t a very friendly sort, but he was very competent and seemed like this was no big deal.  That reduced our nerves tremendously, but with a 6 month old who knows what could go wrong.  Worrying about his reaction to the anesthesia was my biggest concern. It was a laproscopic surgery and Tyler would have 3 small incisions where they would straighten his intestines back out.  Easy Peasy.

Finally at 11pm Sunday night, they started the surgery.  Eric and I were curled up in the waiting room praying, hoping and worrying pretty much all by ourselves that night.  I think both of us were just hoping beyond hope that everything would be alright.  Finally around 11:45pm the doctor came in and told us the best news ever.  The air enema had evidently just taken awhile to take effect and his bowels had straightened out. Everything was fine.  Tyler did have a hydrocele probably from all the throwing up that they would go ahead and take care of since he was already under.  Then the waiting began for him to wake up.  He came out perfectly.  I wouldn’t expect any less from my brave little boy.  I let Eric go in first because he was way more shaken from all of this than I was at least visibly.  I think somewhere around 2am we finally got back to Tyler’s room for a little sleep

The only picture of Tyler during this time.  This was on Labor Day after everything was ok.

The only picture of Tyler during this time. This was on Labor Day after everything had happened an he was ok.

The next day, Monday (Labor Day), they said Tyler was doing fine, but they wanted to watch him for awhile longer to make sure his bowels weren’t affected by any gangrene and were working fine.  So we began a day of trying to convince Tyler he wasn’t hungry after not keeping any food down since basically Friday morning.  It was difficult, but it didn’t matter because he was going to be ok.  We had an absolutely wonderful nurse that day.  I can’t remember her name now but she went out of her way to find toys for Tyler to play with and tried to put off medicine if we were all napping. She was amazing.

After all of that, finally on Tuesday morning they gave us the ok to feed Tyler.  Eric’s mom showed up that day.  She’d been on vacation that weekend, and my parents couldn’t come up because they had Guster and the farm animals, not to mention the 5 hour drive , so it had just been the 3 of us doing all of this together, our little family.  Finally around 2pm they said we were free to go home.  It was one of the best days ever.  Tyler was happy and doing well.  Eric and I were exhausted but so incredibly happy.

Tuesday night after we got home.  He's so happy that no one could tell he'd just had a miserable life threatening 3 days

Tuesday night after we got home. He’s so happy that no one could tell he’d just had a miserable life threatening 3 days

So this story had a very happy ending, but there is one part that hangs over us everyday with every virus or cold Tyler gets.  There is a very real chance that this could occur again especially since he’s had it once already.  The intussusception was caused by the virus that had enlarged a gland which caused the bowel to rub against itself and telescope.  There is about a 10% chance of it happening again.  Luckily the bigger he gets the less likely it’ll happen, and it’s very rare for it to happen after the age of 2.  Since we’re nearing Tyler being 18 months in the next week or two, it’s become a much more distant memory and less of a worry.  On days like today when we’re having fun with our sweet boy and he’s laughing and playing it’s hard to remember that he was ever that sick.

Tyler and Eric tailgating before the Illini football game today.
Tyler and Eric tailgating before the Illini football game today.
Chicken Pox and Salsa

So it’s been awhile again, but we’ve been on vacation (more about that later though when the pictures are ready to go)!  Of course it takes time to get ready before, so it’s been busy.  The thing is it was even busier than it should have been because Mr. Tyler came down with the chicken pox about a week and a half before we left.  He came down with them on a Saturday the same day as we were supposed to go to a birthday party and had a busy weekend planned!

Tyler didn’t have a bad case tough.  They weren’t even bad enough to get a spotty dotty picture luckily!  He had had the chicken pox vaccine, but only the first one so far, so my special little boy is even more special since he’s that 1 out of 10 people that still gets it after the first vaccine.  He was better in about 4 days and got one fun day with Grandma E. and really didn’t itch much at all.  He was a bit grumpy though 🙂

Since all our plans were cancelled for that weekend to keep everyone away from spotty Tyler, it meant that some cooking could be done.  It was time for fresh salsa!

VeggiesChopped

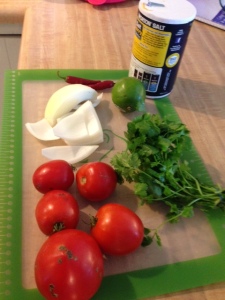
The tomatoes, cilantro, onion and cayenne peppers

Garden tomatoes, onion, cilantro, lime and salt

Garden tomatoes, onion, cilantro, lime, cayenne peppers, and salt

The tomatoes and the peppers came from our garden.  I used:

  1. 5 small to medium tomatoes,
  2. about half an onion finely chopped,
  3. about a quarter cup of cilantro finally chopped,
  4. one lime juiced,
  5. 3 cayenne peppers,
  6. 1/2 tsp salt

I just combined them and then refrigerated for a few hours and it was time to enjoy and we certainly did!  There’s nothing like garden fresh salsa in the summer!

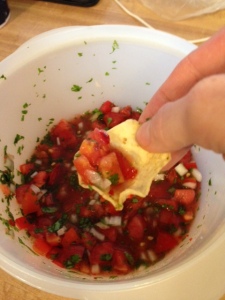
Digging into the fresh salsa

Digging into the fresh salsa

Rockin’ the Landscape

This is a project that has taken us what seems like forever, but I have to remind myself this wasn’t supposed to be a fast projec,t and no project is speedy when you have a 15 month (and now nearly 17 month old) to watch.  I can finally say that all of our existing flower beds are finished.  Other than planting annuals, I’m hoping never to have to mulch, plant perennials or put down weed blocker again.

If you remember at the end of this post, I showed a picture of what our back flower beds looked like in the beginning stages of “Operation Never Mulch Again”.  It was pretty sad and weedy, but it’s looking a lot better these days!

The back patio and flower beds after putting down new weed blocker and mulch. A cute puppy always helps things look better too.

We decided to go with a typical large river rock that was somewhere around 1.5″ in diameter.  We got it at our local nursery Country Arbors.  After doing some bad math and thinking we needed somewhere around 11 cubic yards, yes it’s hard to compute inches to feet and feet to yards, we finally realized that we needed about 2.5 cubic yards, but figured we could get away with 2 c.y.  My parents came up a couple weekends ago, and my mom watched Tyler while Dad helped us tear up old mulch, put down the weed block, and shovel in the new rock. As we worked, it became obvious we weren’t going to get everything done. We got all of the back done, the small beds around the garage door and the front door, and about 2/3’s of the way through our 33′ front bed. We needed another load of rock.

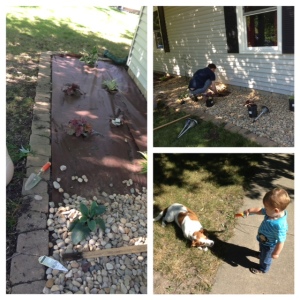
How far we got with our first load of rocks, starting planting of our shade plants and what Tyler, Guster and I did while Eric planted.

How far we got with our first load of rocks, starting planting of our shade plants and what Tyler, Guster and I did while Eric planted.

The next weekend we went back out to Country Arbors and ordered another cubic yard of river rock. While we were there, we decided to look for shade plants. We have a huge maple tree in the front of our house. It shades the entire front yard, which faces east, in the morning while the house shades the front in the afternoon. We had had a few hostas there that had died at some point as well as tulips which do great but are dead by the middle of May (if we’re lucky), and also some irises that evidently don’t like all the shady time either.

Our show stopper middle of the bed plant.  A beautiful purple clematis (hopefully it grows in the shade!)

Our show stopper middle of the bed plant. A beautiful purple clematis (hopefully it grows in the shade!)

Our short filler plants.  Two Japanese grasses, a blue hosta, berry smoothie heuchera

Our short filler plants. Two Japanese grasses, a blue hosta, berry smoothie heuchera

We ended up spending a good $125 on plants just for our front bed. We ended up getting 4 berry smoothie heuchera plants, 2 blue hostas, 4 Japanese grasses that evidently don’t like water very much, and 1 other hosta to match one we already had. We alternated these plants around a “JackManni” Clematis. We had a wonderful person guiding us through the plants at the nursery who said the “JackManni” was the hardiest, most difficult to kill vine they had. We wanted something tall that can actually be seen from the road. We got all of our plants in the ground that weekend. We took turns planting and watching Tyler. While all the plants are pretty short at this point, it adds a little interest to the front of our house.

The front bed filled with rocks and finished!

The front bed filled with rocks and finished!

We got our final load of rock this past Monday and were able to finish it up this weekend. Our total price breakdown was about $320 for the rocks, about $125 on new plants, and around $50 for the new weed blocker liner. In the good news, we are done with the flower beds!! Hopefully now we’ll never have to touch these again! No new mulching every three years, no nasty pulling up old weed blocker and hopefully no new perennials! All of that is totally worth nearly $500.  Our landscaping is done…well maybe we still have this pile of rock left after putting down all the rock we needed…

The rock we have left over from our second order of rocks!

The rock we have left over from our second order of rocks!  I see a new flower bed in our future!

Summer Heat

No it’s not scorching heat that I’m talking about (actually it’s gorgeous with highs in the 70s and lows in the 50s! Perfect!), it was just time to start baking with my favorite summer produce, the zucchini!  Yeah, not what answer that most people would have I’m sure.

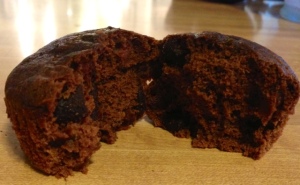
Delicious double chocolate zucchini muffins.  Great for breakfast or a snack!

Delicious double chocolate zucchini muffins. Great for breakfast or a snack!

We don’t have zucchini in our garden because Eric is not a fan to say the least.  Plus they take up a lot of room, which we definitely don’t have room for.  My dad on the other hand who has plenty of room for a huge garden, but he only plants two kinds of plants.  Tomatoes and zucchini!  While his tomatoes aren’t doing great this year (I totally won with the first ripe tomato this year!), his zucchini are going gangbusters!  He’s got a bumper crop and is picking at least 1 a day. I think my parents eat something with zucchini in it everyday.  He and my mom came up this past weekend to visit, and he brought me a big bag of huge zucchini.  I took most of them to work for my coworkers, but I kept one back for some baking for myself.
BatterI contemplated making regular zucchini bread for awhile, but since Eric wouldn’t be eating any of it (I keep telling him it only tastes like cinnamon, but he won’t listen!), I decided to make some awesome double chocolate zucchini muffins!  The best part of these (other than the chocolate) is that it takes 2 cups of zucchini, so I practically used up my entire zucchini.  I wish I’d gotten a picture of it before I shredded it.

Here’s the recipe I followed.  It’s from simplylifeblog.com.  They are fantastic.  I made a couple of changes to suit my tastes.  I added a little extra honey to sweeten it a bit more.  Also, I didn’t fully ring out the zucchini to keep a little more of the moisture in.  Lastly I added about a cup and a half of semi-sweet chocolate chunks instead of the cup of semi-sweet chips.  I love them, which is good since I’ll probably be eating all of them myself…but I don’t mind!

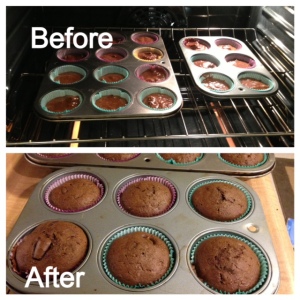
In the oven and when they came out!  Warm and delicious!

In the oven and when they came out! Warm and delicious!


Zoo Trip (1 of 2)

So I got even lazier.  That’s not really true at all considering how busy we’ve been.  Instead of a usual things I’ve made post (although I have some of those and some changes coming outside soon), this is going to be things that we’ve done or at least a start of that.  It’s been a really busy month and a half. The first weekend in our busy month was the first weekend in June when we headed down to the St. Louis Zoo with my parents for Tyler’s first zoo trip.

It’s a pretty long drive to St. Louis for a then nearly 15 month old, but he got through it like a champ.  We had a pretty good day for it too.  It was cloudy but not rainy and actually a little chilly.  At least the weather didn’t exhaust us by the end of the day.

Eric and Tyler both have a love of touching things so they got a lot of that at the zoo.

Eric and Tyler both have a love of touching things so they got a lot of that at the zoo.

Grandma and Grandpa Ensor came with us for a fun filled day.  Tyler's pointing at one of the monkeys in the monkey house.

Grandma and Grandpa Ensor came with us for a fun filled day. Tyler’s pointing at one of the monkeys in the monkey house.

It was a pretty long day for all of us. We all left home around 9am, and we met my mom and dad in Effingham to ride together to St. Louis. We finally got to the zoo around noon. It was immediately time to eat. We were all starving by then!  Finally it was time to see some animals after that!  We found out that Tyler really loves the animals.  No particular favorite just all animals. He would point and call them whatever name of an animal he could actually say even if that wasn’t really at all close to what the animal actually was.  The ones he got pretty close were dog for a hyena, and he mooed at some antelopes that looked like cows.  All the animals were new and fun for him, so I’m not sure he really had a favorite.  If I had to guess, he may have enjoyed the monkey house the most of all.  He loved saying “ohoh ahah” to the monkeys and pointed a lot.  It was rather adorable if I do say so myself.  We took lots of pictures, but the following are a sampling of what we saw.

Lions taking afternoon siestas.

Lions taking afternoon siestas.

My favorite of the day were these two kangaroos.  I took about 5 shots of them boxing with each other!

My favorite of the day were these two kangaroos. I took about 5 shots of them boxing with each other!

Tyler rubbing the gorilla's nose for good luck.  It's like Lincoln's nose right?!

Tyler rubbing the gorilla’s nose for good luck. It’s like Lincoln’s nose right?!


Adding Color

Well I went two weeks without writing a post.  It was bound to happen, and really I have nothing to blame other than just needing a break. Now I’m my brain is fresh and ready for a new (long) post.

When you live in a grey house that has black trim and white windows like we do, the outside can seem a little dull and lifeless all winter long with no plants to add a little color to the curb appeal.  When spring comes around I go a little crazy adding plants to the front of the house.  This year was definitely no exception.

One of the gerbera daisy plants in a flower bed.

One of the gerbera daisy plants in a flower bed.


One of the hanging baskets I created for the front yard

One of the hanging baskets I created for the front yard


This year, I started by adding pink and yellow gerbera daisies near our front door in an area that gets a lot of sun.  They were the flowers that were in my wedding bouquet, so they have a lot of sentimental meaning to me.  I try to plant a few of them every year.  I also create my own petunia hanging baskets to hang near our front yard light.  Every single year they had died nearly as soon as I planted them.  Not to sound like a commercial, but last year I decided to try Miracle Gro potting soil, and they’ve been amazing ever since!  They even looked great through the drought year last year, and they’re doing great again this year.  I’m all over the Miracle Gro potting soil from here on out.  It makes my life easier!

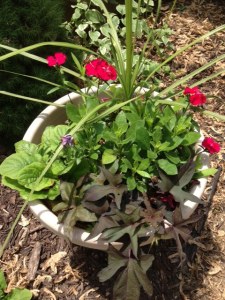
Eric's flower pot for the front of the house

Eric’s flower pot for the front of the house


My flower pot for the front of the house

My flower pot for the front of the house


Every year we also arrange 2 flower pots for the front of the house.  Eric picks the flowers for one, and I pick the flowers for the other.  We always follow the rule of one tall grassy plant, a couple types of flowering plants, and then one vine to grow over the side.  I always have a couple of purple plants, which are  not blooming in this picture to go with my purple potato vine.  Eric usually goes with the orange flowers.  I’m pretty sure if he could find blue flowers he liked that he would have an Illini pot every single year!

This year all our flowers are looking really great!  We’re hoping to add some shade perennials to the front of our house this year to make it look a little more interesting, but I think we really added a lot of color to perk up the drab front of our house this year.

Our first ripe tomato of 2013!

Our first ripe tomato of 2013!

Also with our green thumbs, this year our garden is doing ok.  I’ll take some pictures and do a full update later, but we did get our first ripe tomato last week!  It’s the earliest we’ve ever gotten a ripe tomato.  Usually it’s not until at least the middle of July.  It’s tiny, about the size of a ping pong ball.  It also have a sad looking spot on the bottom of it, so there’s not a whole lot to eat there.  It’s still early though.  The best part by far was that I finally beat my Dad to having a ripe tomato!

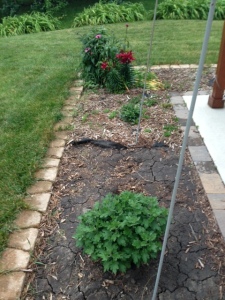
Getting ready to clean up the back flower bed!

Getting ready to clean up the back flower bed!


The last thing I’ve been working on outside is around back.  About 3 years ago we redid the backyard patio and added these flower beds.  They’re gorgeous, but the mulch was looking really sad, and the weeds were coming up through the weed blocker, so it’s definitely time to redo it.  This is as far as I’ve gotten so far getting rid of the old mulch.  The question is do we go with rock, which we won’t have to replace again in 3 years and Tyler won’t try to eat, or with the cheaper mulch again.  I’d really love not to have to redo these in just another few years, but the rock can be really expensive compared to the mulch.  I’ve already gone with a higher quality weed blocker at least, so hopefully I won’t have to rip it up again!  What do you all think?  Cheap but short lifetime or long lifetime with a much higher price tag?


There’s No Nuts in Nutella!

Ok there are actually nuts in Nutella, but it doesn’t taste like there are, and that’s all that is important in our household.  Neither Eric nor I like peanuts or walnuts or cashews.  It’s actually pretty surprising that Eric likes peanut butter (which I don’t).  However we both love Nutella, so when I decided that I wanted to make ice cream, Nutella ice cream seemed liked something we’d both enjoy.  By the way, be prepared for lots more ice cream recipes as we move through the summer.  I love my ice cream maker plus in my mind, if I make it, it’s not nearly as fattening! 🙂

All the steps towards making the ice cream.

All the steps towards making the ice cream.

I made a recipe found here because it wasn’t just a smooth ice cream but is “crunchy” as well.  Compared to some of the ice creams that I’ve made this one has very few ingredients, egg yolks, heavy whipping cream, half and half, Nutella and salt.  I only had to buy the half and half for this recipe. The reason that this is termed crunchy was because at the end more Nutella is swirled into the ice cream, which is really tasty and ramps up the Nutella flavor.  I didn’t swirl all of the 1/4 cup in, but I wish I would have.  For us, it didn’t seem to add a crunch as much as just a different texture.  It’s kinda like finding chocolate bits in your ice cream.  It makes it go from tasting like chocolate ice cream to Nutella in my opinion.  One note from me is that you might want to put this in something microwaveable. It gets VERY solid when it’s completely frozen and even our really sturdy spoons and ice cream dippers felt like they were going to bend when dishing this out.  A quick zap in the microwave would really save some spoons I think.

The ice cream has the nutella swirled in and is ready to go into the freezer

The ice cream has the Nutella swirled in and is ready to go into the freezer

We’re still finishing this ice cream off.  It’s hard to have a dessert in the evening when you have a toddler you don’t want to share with and he keeps going to bed later and later!  Not to mention trying to eat a little healthier.  It was really good though, and I now want to try other Nutella desserts as well!

My dished out ready to eat bowl of ice cream.  Yum!

My dished out ready to eat bowl of ice cream. Yum!

Memorial Day weekend

Happy Memorial Day weekend everyone!  I was able to spend 3 wonderful days with my 3 guys.  I always look forward to the 3 day weekends to spend lots of quality time with my family while still remembering all those who served our country.

The 6 ingredients needed to make raspberry bars

As for our weekend we stayed very busy!  On Saturday, we went to a 3rd birthday party and were able to catch up with a bunch of our friends.  Sunday, started off great with Tyler sleeping until 6:45am but by the afternoon he developed a fever.  I should have known what was coming when he sleeps in!  Hopefully it’s just some teeth coming in and not another ear infection.  Today even though Tyler was still under the weather we took a quick trip to Allerton Park in Monticello to see the pretty flowers.  We just beat the heavy rains before we left.  Unfortunately, we still had to drive back through them though.

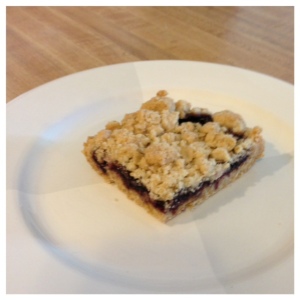
A tasty raspberry bar

A tasty raspberry bar

These raspberry bars which I didn’t make this weekend would have been perfect because they don’t require a whole lot of time or effort.  Besides that they are relatively healthy if you ignore the butter and brown sugar.  These only take 6 ingredients, and I only had to specially buy the raspberry jam for this.  The rest are normal staples.

I made this recipe on a work night for Eric to take for dessert in his lunches. Some changes I would consider making are mixing blueberry jam and strawberry jam with the raspberry jam and have mixed berry bars instead.  I’m sure there are plenty of other jams that would be really tasty in these as well.

Hope everyone had a wonderful holiday weekend!

Can I sew? Totes!

Can I say totes while being 30-something and sound cool? I’m guessing I can’t pull it off. But what can I pull off? Making a tote bag to haul my and Tyler’s stuff to work/daycare everyday. I was nervous about this project, but this might be the easiest one I’ve done so far…or I’m just getting better at sewing.

So first why a tote bag?  Well for the past 2 years or so I’ve been using a Menard’s reusable shopping bag.  They aren’t the most stylish bags I’ve ever seen, and on top of that I’ve hauled so much stuff in them that both of our bags now have holes in them .  It was beyond time for a new bag.

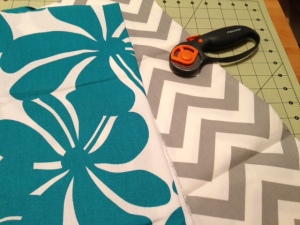
My two fabrics.  The chevorn was for the inside and the teal flower print was for the outside.

My two fabrics. The chevron was for the inside and the teal flower print was for the outside.

I found a great tutorial just by Googling for tote bag sewing instructions.  Outside of cutting the 4 pieces of fabric for the body of the bag, it only took me about 3 hours to crank out the rest of this.  That may sound like a lot, but for a novice like me, it’s pretty good!  I decided that the 13.5″x14″ created in the tutorial was too small for me especially when I have to haul diapers to daycare. I increased the size to 17″x16.5″.  I unfortunately didn’t realize I was going to do this when I bought my fabric from Fabric.com, so I had to go back and order more.  Even with having to do that, I still only spent about $14.50 for the entire bag.  I don’t think I could have found a bag at the store for cheaper than that, so I think I finally saved money on a project!  If I’d ordered the right amount of fabric the first go around I would have saved significantly on the shipping too!

So I forgot to take pictures of all my steps because I got in such a zone once I started on the straps and was sewing it all together.  I’m pretty proud of this bag though.  I use it every single day, and I really like how it looks.  It actually looks like something I bought at a store.  I’m seriously considering making another one just for the fun of it.

My finished tote bag.  I didn't get a picture of the chevron on the inside, but it's there!

My finished tote bag. I didn’t get a picture of the chevron on the inside, but it’s there!

This is a project that I could definitely see giving as a gift or something like that. Everything else I’ve done, not so much. I’m definitely beginning to feel like I’m actually becoming a decent sewer though. I’m pretty proud of my progress since the middle of January. Now I need to figure out what to sew next! Any ideas?